Behold the cuteness! Paper piecing patterns will are available on Payhip. As you complete blocks, I'd love to see your work in the Flickr group here.

I used the Road 15 fabric line. You will also need 3/4 yards of black fabric for the road, 2 yards of cream background fabric, and 3/4 yards of border fabric (or more if it is directional).

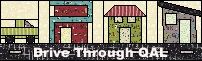
You can also grab the Drive Through Quit-Along button below. Just copy the HTML in the window below.
#3 - School

#4 - Swing

#5 - Slant Home

#6 - Flat Roof

#7 - Apartment

#8 - Porch

#9 - Modern

#10 - Slide

#11 - Wonky

#12 - Truck


Road Construction:
Cut one 2 1/2" x width of fabric (42" or more) strip of a cream, white, tone-on-tone or low-volume fabric and one 2 1/2" x width of fabric (42" or more) strip of black. Sew together the longest sides using a 1/4" seam. Press toward the black fabric. this means your seam should be laying underneath the black fabric. Measure to make sure the width is 4 1/2". If it is larger, adjust your seam allowance to be larger. If it is less than 4 1/2", adjust your seam allowance to be smaller (a scant 1/4"). Cut the cream/black strip in half.

Again, sew together the longer sides with black touching cream. Keep the selvage or jagged ends on the same end so fabric lost is minimized.

Cut the end even by lining up the horizontal lines of the ruler with the center seam, rather than the top or bottom raw edge. Crosscut at 6". Pull the larger portion of the fabric aside. Slide the ruler without moving the fabric you are cutting, and cut at 5", 4", 3", 2" and 1". Repeat this process two more times. Then cut three more 1" strips. You should have 21 strips total.

Take 16 of the strips and sew them together in pairs by joining the shorter sides, black to cream, with 1/4" seam (unless you needed to adjust). Press toward the black fabric. You should now have 8 strips.

Again, sew the strips together in pairs by joining the shorter sides, black to cream, with 1/4" seam. Press toward the black fabric. You should now have 4 strips.

Take four more of the 8 1/2" original strips. Add one to each of your longer strips, being careful to adjoin cream to black with a 1/4" seam.

Locate your remaining original strip.

Use a seam ripper to remove the stitching.

Add one 2 1/2" x 1" rectangle to each of your long strips. Attach the 1" side to the 1" end of the strip with right sides together using a 1/4" seam. Make sure black is adjoined to cream and cream is adjoined to black.
You should have four strips that measure 42 1/2" long at this point.
Cut 8 2 1/2" x width of fabric strips of black. Sew the long side of these strips to the top and bottom of the skinny 1" strip you created.
Layout Assembly:
Unfinished blocks should measure 8 1/2" wide x 12 1/2" in height. To accomplish this, measure the width of each block. For each, if it is less than 8 1/2", add a piece with the same height and 9 minus the current width as the width.
Next, get each block to a uniform height by adding a rectangle to the top that measures 8 1/2" in width x 13 minus the block's current height. Sew this rectangle to the top of the block, and all blocks should now measure 8 1/2" x 12 1/2".
Cut twenty 2 1/2" x 12 1/2" rectangles of background fabric. These rectangles will serve as spacers between the blocks.
Sew rows of building and vehicles together in a
spacer-block-spacer-block-spacer-block-spacer-block-spacer fashion. Rows should measure 42 1/2" long.
Sew a road strip underneath each building row. Then, sew all the rows together.
For the border, I cut six 4" strips from 3/4 yard of fabric. This will make a 3 1/2" finished border. First, cut two strips to 42 1/2". Attach these to the top and bottom of the quilt. Then attach two of the remaining strips end-to-end to create a longer strip. Repeat this process with the other two remaining strips. Cut these two longer strips to the current height of the quilt top. To find this measurement, measure the right, middle and left side of the quilt from top to bottom. Find the average of these three measurements, and cut the strips to this number. Press the strips in half to find the middle. Fold the quilt in half to find the middle. Pin the middle of the strip to the middle one side of the quilt, with right sides together. Pin the far right and left sides. Work the fabric evenly to pin every five inches of so in between the three pins already inserted. Sew border on using a 1/4" seam. Repeat for the other side border. This process helps prevent wavy borders.
When you have finished your quilt top, please upload a picture to the Flickr group.

This quilt is so adorable! Thanks for sharing the patterns. I'm a newbie to paper piecing, but these look like something I'd be willing to tackle.
ReplyDeleteYou are welcome! I promise, they aren't very many pieces, and are pretty quick to piece. If you have any questions, send me an e-mail at aftonwarrick@hotmail.com.
DeleteThis is so awesome, LOVE it! If I ever learn to paper piece this is a to do for sure! And Road 15, couldn't be more perfect :)
ReplyDeleteI just printed #13 from Craftsy and am having trouble understanding which bottom patterns to use. Do I use the one that is all A or do I use the one that is B and C? Why are there two sets of walls, windows, and doors?
ReplyDeleteSimply adorable!! And I have always loved this fabric line, but never found a pattern to fit it. Now to find a little boy that needs a quilt :)
ReplyDelete